Installing MSD 6 AL with Tachometer Adapter. 8910 EIS
INSTALL AT YOUR OWN RISK
MSD 6AL, PN 6420
The 6AL delivers everything the 6A does with the addition of a built-in Soft Touch Rev Control. This feature allows you to set an rpm limit to protect the engine from over-rev damage caused by driveline failure or missed shifts. Other MSD RPM Controls can be connected to the 6AL such as a Three Step Module Selector (PN 8737) or RPM Activated Switch (PN 8950). The 6AL also comes supplied with rubber shock mounts and 3,000, 6,000, 7,000 and 8,000 rpm modules.
3SFE internal Ignition Coil - ***I would install a New Ignition coil with MSD unit.
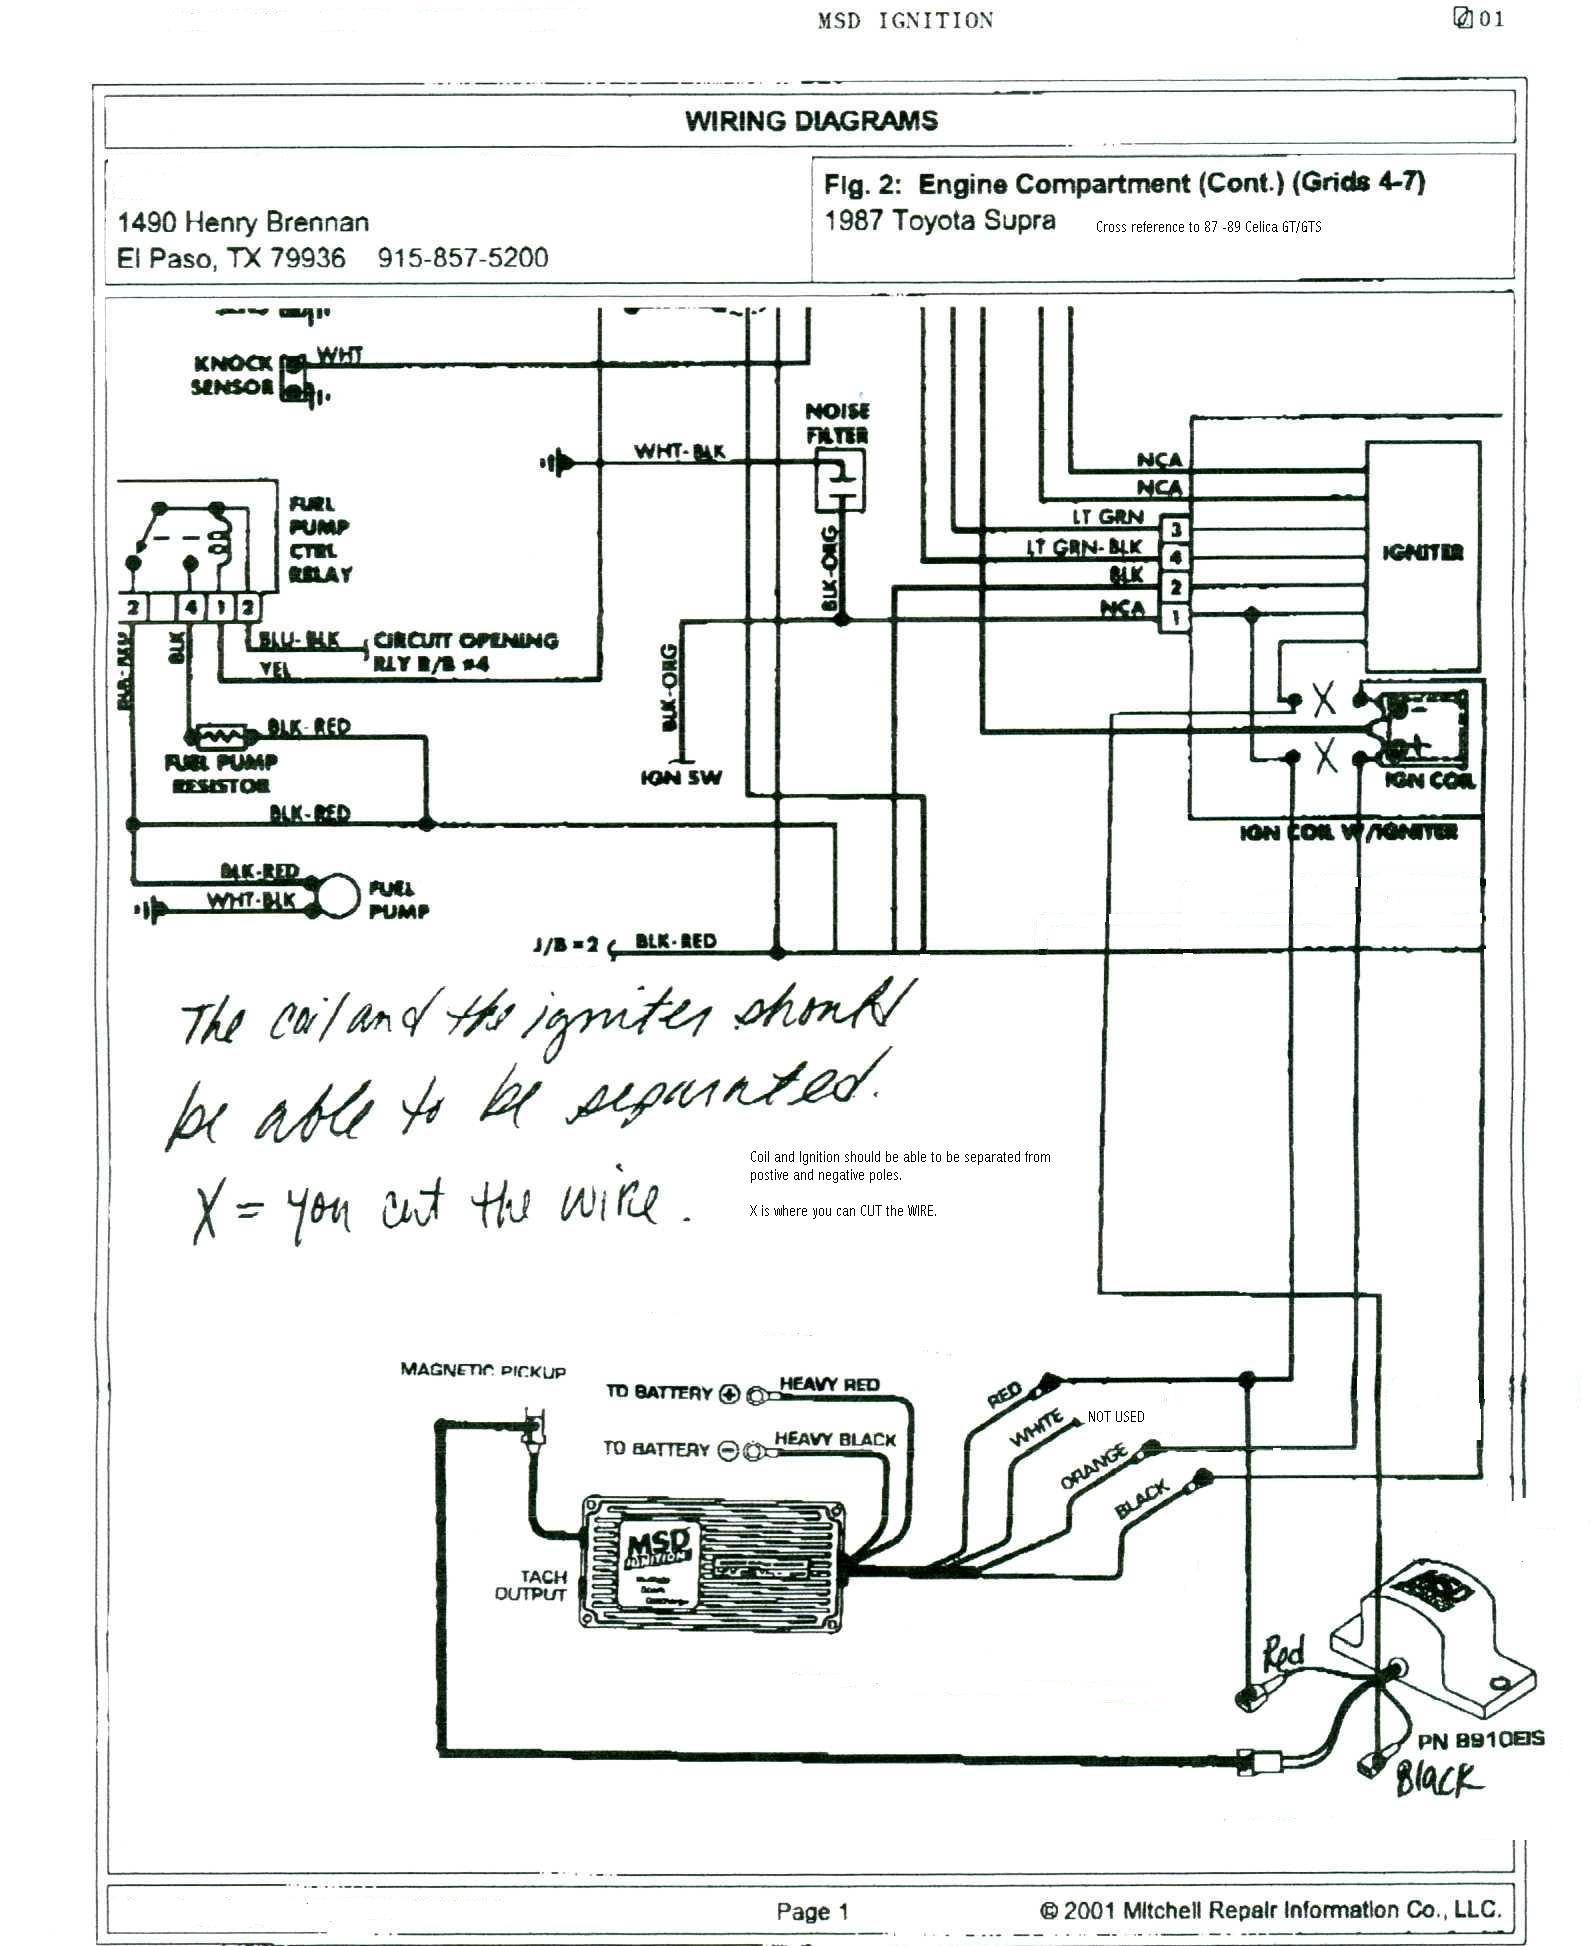
Ignition Coil positive - One wire - Brown.
Ignition Coil negative - Two wire Blue / Black
Click here to see MSD Wire Diagram installation from MSD Tech Support. The Supra wire diagram is being used as a cross reference in how to install MSD 6 AL - EIS..
I installed the MSD 6 AL and 8910 EIS in the rear trunk ran wires through the firewall to the internal ignition coil. This setup allows the MSD to operate at passenger cabin temperatures away the engine heat compartment.
*There is one draw back - with it installed in the rear you can hear a faint click ticking noise. But you will get used to it your throaty muffler will blend the noise out.
Installed in the rear allows direct 12volt power from the relocated battery in the rear. To keep the MSD signal from deteriorating since it's farther away from the ignition coil. I ran thicker gauge wire and connectors from Radio Shack(twice the size of the MSD 6 AL unit) hopefully to improve signal spark to the internal ignition coil setup.
***Now the 3 wires off the stock coil has to be cut out of the black rubber sleeve were the two wires orange and black of the MSD will be fitted in its place to be connect to negative and positive..